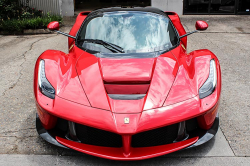
Car Paint Chip Repair: Cost, Methods & How to Prevent Future Damage
Every time you drive, your car’s paint is under assault. Gravel kicked up by the car ahead of you, road debris, even small stones scattered by construction work, all of it can leave chips that cut through clear coat, color, and sometimes all the way down to bare metal.
According to the AAA Foundation for Traffic Safety, road debris was a factor in more than 200,000 police-reported crashes over a four-year study period, resulting in approximately 39,000 injuries. While most paint chips don’t cause accidents, they create the same underlying problem: exposed surfaces that invite rust, corrosion, and costly bodywork down the line.
So what should you actually do about that chip on your hood? This guide breaks down what car paint chip repair costs, how to fix paint chips on a car yourself (step-by-step), when to call a professional, and, most importantly, how to stop chips from happening in the first place.
Why Every Paint Chip Needs Attention (Even Small Ones)
It’s tempting to ignore a paint chip the size of a pinhead. But here in the Pacific Northwest, where rain is a near-constant companion, even a tiny chip creates a direct path for moisture to reach bare metal. Once water contacts unprotected steel, oxidation begins and rust spreads beneath the surrounding paint where you can’t see it.
The practical consequences of ignoring chips:
- Rust progression: A chip that costs $30–$60 to repair today can lead to panel rust, which can cost $500–$1,000+ to fix.
- Resale value loss: Kelley Blue Book notes that a vehicle’s exterior condition is one of the primary factors in trade-in valuation. Visible chips can reduce offers by hundreds of dollars.
- Lease-return penalties: Most lease agreements charge for any paint damage beyond normal wear, typically $100–$500 per panel, depending on severity.
- Spreading damage: Portland’s freeze-thaw cycles during winter cause moisture trapped in chips to expand, cracking surrounding paint and accelerating peeling.
Bottom line: fixing chips early is always cheaper than fixing what chips become.
How Much Does Car Paint Chip Repair Cost?
The cost of repairing a paint chip depends on three factors: the severity of the damage, the number of chips to fix, and who does the work. Here’s a realistic breakdown based on current market pricing:
Repair Method | Typical Cost | Cosmetic Result | Durability | Best For |
DIY Touch-Up Kit | $15–$50 | Fair | 1–3 years | Small chips, rust prevention on a budget |
Dr. ColorChip System | $40–$70 | Good | 2–4 years | Multiple small chips, highway rock chip patterns |
Mobile Touch-Up Tech | $150–$300 | Very Good | 3-5 years | Multiple chips, minor scratches, lease returns |
Auto Body Shop | $250–$800+/panel | Excellent | 5-10+ years | Deep chips to bare metal, large areas, and rust repair |
Paint Protection Film (Prevention) | $900–$2,500+ (partial front) | N/A (prevents damage) | 5-10 years | Preventing chips before they happen |
A note on insurance: Most basic auto insurance policies don’t cover cosmetic paint chip repair. However, if you carry comprehensive coverage, your policy may cover chip repair when the damage results from road debris. Contact your carrier to check, but keep in mind that filing a claim for a $200 repair may not make sense if your deductible is $500.
DIY vs. Professional Repair: When Each Makes Sense
DIY repair makes sense when:
- The chip is smaller than a pencil eraser (¼” or less in diameter)
- The damage hasn’t reached bare metal (you can see primer or color, not silver/gray steel)
- You’re comfortable with detail work and have a steady hand
- Your primary goal is rust prevention (not a showroom-perfect cosmetic finish)
Call a professional when:
- Bare metal is exposed, and there are signs of rust (orange or brown discoloration)
- You have multiple chips clustered in one area (common on hoods and front bumpers)
- The chip is larger than ¼, or the surrounding paint is cracking or peeling
- You’re preparing for a lease return or sale (cosmetic quality matters)
- Your car has a specialty finish (metallic, pearl, matte, tri-coat) that’s difficult to color-match
Being honest about your skill level saves money in the long run. A botched DIY repair of the thick, blobby touch-up paint, which is obvious from ten feet away, often needs to be sanded down and redone by a professional, effectively doubling your cost. If you’re weighing a full repaint against targeted correction, we break down that decision in our guide to choosing between paint correction and repainting.
How to Fix Paint Chips on a Car: Step-by-Step Guide
If you’ve decided to tackle the repair yourself, follow these steps carefully. Rushing is the number-one cause of poor DIY results.
What you’ll need:
- Paint chip repair kit with color-matched touch-up paint (use your vehicle’s paint code found on a sticker inside the driver’s door jamb, glove box, or trunk)
- Isopropyl alcohol (90% or higher) and microfiber cloths
- 2000-grit wet/dry sandpaper
- Automotive primer (if bare metal is exposed)
- Clear coat pen or applicator
- Polishing compound and applicator pad
Step 1: Clean and Prep the Chip
Wash the chipped area thoroughly with car wash soap and warm water. Once dry, wipe it down with isopropyl alcohol on a clean microfiber cloth. This removes wax, road film, and any oils from your fingers that would prevent paint from bonding properly. Let it air dry completely. If you apply paint to a damp surface, bubbling and adhesion failure are almost guaranteed.
Step 2: Remove Loose Paint and Smooth the Edges
Use a toothpick or the tip of a craft knife to gently flick away any loose paint flakes around the chip. Compressed air also works for clearing debris. If the edges feel raised or rough, lightly sand just the immediate edge with 2000-grit sandpaper using very gentle pressure. You’re not trying to sand the surrounding paint; you’re only smoothing the transition at the chip’s perimeter.
Step 3: Apply Primer (If Needed)
If you can see bare metal or gray body filler at the bottom of the chip, primer is essential. Apply a thin layer using the fine-tip brush in your repair kit. The goal is complete coverage of the exposed metal without any overlap onto the surrounding paint. Let it dry completely for 24 hours, which is ideal in Portland’s humidity, though 4–6 hours may suffice in warm, dry conditions. If the surface feels tacky at all, it’s not ready.
Step 4: Apply Color-Matched Paint
This is where patience matters most. Apply paint in very thin layers using the brush or paint pen from your kit. Thin layers dry faster, shrink less, and match the original paint thickness more closely. Apply one layer, wait 15–30 minutes for it to dry, then add another. Most chips require 2–4 layers to fill properly.
Pro tip: It’s normal for the final layer to sit slightly above the surrounding paint. Touch-up paint shrinks as it cures, but if it still sits slightly high after 48 hours, that’s fine; you’ll level it in the next step.
Step 5: Sand to Level
After the paint has fully cured (wait at least 48 hours), use 2000-grit wet sandpaper to gently level the repaired area with the surrounding paint. Dip the sandpaper in water frequently and use extremely light pressure. A useful technique: wrap the sandpaper around the eraser end of a pencil to control the contact area and avoid sanding the surrounding clear coat.
Step 6: Apply Clear Coat
Apply clear coat in thin layers, just like the paint. Two to three thin coats with 15–20 minutes of drying time between each will seal your repair and restore the glossy finish. Let the clear coat cure fully before the final step, at least 24 hours.
Step 7: Polish and Blend
Using a small dab of polishing compound on a clean microfiber cloth, buff the repaired area in firm circular motions. Extend the polishing beyond the repair zone to blend the finish with the surrounding paint. This final step eliminates any haze from sanding and helps the repair disappear into the car’s existing finish.
How to Prevent Paint Chips from Happening Again
Repairing a chip is fixing a symptom. If you want to address the root cause—the fact that every drive on I-5, Highway 26, or I-205 puts your paint at risk—you need a physical barrier between road debris and your car’s finish.
Paint Protection Film (PPF): The Gold Standard
Paint protection film is a transparent, thermoplastic urethane layer applied directly over your car’s paint. Think of it as an invisible shield: when a rock strikes the film, the material absorbs the impact force and distributes it across the surface rather than allowing a concentrated point of contact that would chip paint.
Industry testing shows that quality PPF blocks an estimated 90–95% of typical road debris impacts at highway speeds (DIY Wrap Club). The film is typically 8–12 mils thick at least four times thicker than your car’s factory clear coat, and premium options like XPEL include self-healing technology that causes minor surface scratches to disappear with heat exposure.
Where PPF provides the most protection:
The areas most vulnerable to rock chips are the front bumper, hood, fenders, side mirrors, and rocker panels. A partial front-end PPF package covering these zones typically costs $900–$2,500, depending on the vehicle, and offers 5–10 years of protection. Full-body PPF runs $5,000–$8,000+ but eliminates chip risk on every panel.
At Elite Window Tint, we’re an XPEL-certified Platinum dealer, one of the highest certification levels available. We install XPEL Ultimate Plus and XPEL Stealth at both our Milwaukie and Beaverton locations. If you’ve just spent time and money fixing chips, PPF installation ensures you won’t have to do it again.
Ceramic Coating: Protection Against Everything Except Chips
It’s worth addressing a common misconception: ceramic coating does not prevent rock chips. Ceramic coatings reduce surface friction, making your paint easier to clean and more resistant to chemical etching from bird droppings, tree sap, and UV damage. But at just 1–2 microns thick, a ceramic coating provides no meaningful impact resistance against a rock traveling at 60+ mph.
That said, ceramic coating and PPF complement each other well. Many of our Portland-area customers apply ceramic coating over their PPF to get both impact protection and hydrophobic (water-repellent) properties. You can read more about how to maintain PPF and ceramic coating together.
Other Ways to Reduce Chip Risk
While PPF is the most effective solution, a few driving habits also help reduce exposure to road debris:
- Increase the following distance: Most rock chips come from the tires of the vehicle directly ahead of you. Adding a few extra car lengths, especially behind trucks and construction vehicles, gives debris time to settle before reaching your bumper.
- Avoid freshly paved roads when possible: Newly laid gravel or chip-seal surfaces are particularly aggressive on paint during the first few weeks before the aggregate settles.
- Watch for construction zones: I-5 through Portland and Highway 26 toward the coast are frequent offenders for loose gravel, especially during Oregon’s road construction season (typically May–October).
PPF vs. Vinyl Wrap for Chip Protection: Know the Difference
Vinyl wraps change your car’s color and offer some surface-level scratch protection, but they’re not designed to absorb impacts from rocks. At 3–5 mils thick and made from PVC rather than TPU, vinyl wraps lack the impact absorption and self-healing properties of PPF. If chip prevention is the goal, PPF is the right choice. If you want a color change with some protection, a vinyl wrap is an option, but you should set realistic expectations.
For a full comparison, see our guide on clear bra (PPF) vs. vinyl wrap.
Car Paint Chip Repair FAQs
How do you fix paint chips on a car?
Small chips (under ¼”) can be repaired at home with a paint chip repair kit. Clean the area, sand rough edges, apply primer if metal is exposed, build up thin layers of color-matched paint, seal with clear coat, and polish to blend. For larger chips, rusted chips, or situations where cosmetic quality matters, a professional detailer or auto body shop will deliver a better result.
How much does it cost to fix a paint chip?
DIY repair kits run $15–$70, depending on the system. Professional mobile touch-up services cost $150–$300 per chip. Auto body shop repairs range from $250 to $800+ per panel, depending on the extent of damage and paint type.
Why is my car’s paint chipping?
The most common cause is stone chips, small rocks, and debris kicked up by other vehicles while driving. Other causes include harsh chemicals in some cleaners, bird droppings and tree sap (which erode clear coat over time), hail, and the freeze-thaw cycles common in Oregon winters that expand moisture trapped in existing micro-damage.
Can you wrap a car that has chipped paint?
No, at least not well. Both paint protection film and vinyl wraps conform tightly to your car’s surface, which means they highlight rather than hide existing chips, scratches, and dents. Any paint damage should be repaired before PPF or wrap installation. Professional installers will typically require paint correction before applying film to ensure proper adhesion and a smooth finish.
Are stone chip repairs covered by insurance?
It depends on your policy. Standard liability-only insurance does not cover cosmetic paint chips. Comprehensive coverage may cover chip repair caused by road debris, but weigh the cost of repair against your deductible before filing a claim. Contact your insurance provider for specifics.
Does ceramic coating prevent paint chips?
No. Ceramic coatings protect against UV damage and chemical etching and make surfaces easier to clean, but they do not provide impact resistance to rocks or debris. Paint protection film (PPF) is the only aftermarket solution designed to physically absorb road debris impacts and prevent chips.
How can I prevent paint chips permanently?
Paint protection film is the most effective long-term solution. Quality PPF from brands like XPEL lasts 5–10 years, absorbs the impact of road debris before it reaches your paint, and self-heals minor surface scratches. For Portland drivers dealing with I-5 and Highway 26 construction, PPF on high-impact areas (hood, bumper, fenders) is the most cost-effective way to eliminate recurring chip repair.
Stop Repairing Chips. Start Preventing Them.
If you’re tired of finding new chips every time you wash your car, it may be time to invest in protection rather than repair. At Elite Window Tint, we specialize in XPEL paint protection film installation for vehicle owners in the Portland metro area. As an XPEL-certified Platinum dealer, we install the industry’s most advanced PPF with self-healing technology, a 10-year manufacturer warranty, and professional installation that ensures flawless coverage.
Visit us at either of our two locations:
Milwaukie: 14200 SE McLoughlin Blvd, Unit K, Milwaukie, OR 97267 — (503) 786-1020
Beaverton: 10950 SW 5th St #170, Beaverton, OR 97005 — (503) 917-5522
Request a free PPF quote and protect the paint you just repaired.
- Car Paint Chip Repair: Cost, Methods & How to Prevent Future Damage - March 5, 2026
- What Is Window Tinting and How Does It Help Oregon Drivers? - January 13, 2026
- Best Window Tinting in Portland, OR: Why Elite Window Tinting Is the #1 Choice - January 13, 2026